
Automating My San Francisco Studio (Part 1)

With the increased amount of time I’ve spent in my apartment over the last few months and my new found electronics hobby, I thought it’d be fun to try and automate my studio apartment.
Here’s a picture of the apartment (above) in all of it’s 450 square foot glory.
I spend most of my time in the area with my desk, bed, sofa, and television. So, it made sense to focus on making this area as comfortable and usable as possible.
Take note of the robotic vacuum cleaner, the standing fan, and the television. I use these devices daily, but more importantly, they all respond to IR signals.
Consequently, I knew if I could decode the signal their IR remotes were sending, I’d be able to create a circuit that could broadcast an identical signal thereby controlling the device. Additionally, with an Amazon Alexa integration, I’d conceivably be able to make all of these devices voice-controlled.
Demo
Here’s a brief demo of the finished project. If you’re interested in seeing the circuit, code, and other implementation details, read on! Not only can I control my TV through Alexa, but also my standing fan and my robot vacuum cleaner.
Here’s a demo of the fan. Triggering the sleep timer command cycles through the different delay options until the 1, 2, and 4 hour options are all enabled.
Finally, here’s a demo of the robot cleaner returning to the home station when the “dock” command is triggered.
Implementation
The first step was identifying the correct IR codes to send which was by far the most involved part of this project. I had seen some other examples online of people trying to reverse engineer the IR codes their remote controls were sending and they were getting back a single clear value.
Unfortunately, I wasn’t so lucky. Any remote control key I pressed would give me a slew of possible signal codes – not just one discrete value.
So, in order to find the correct one, I’d press the button I was trying to decode a few times to build up a potential list of valid IR signals. Then, I’d programmatically loop through them slowly to try and identify which IR signal was actually triggering the device.
Figuring out what IR encoding the signals were using was another time and research-intensive task.
Here’s the schematic for the IR receiver:
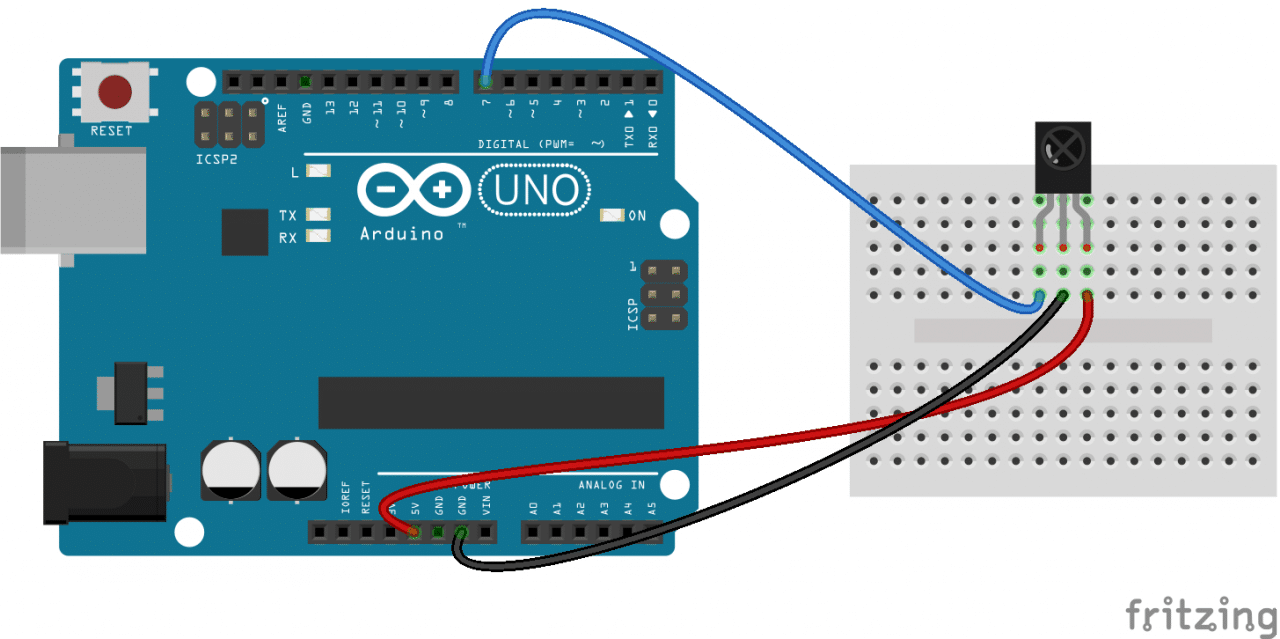
The final circuit is rather simple – an ESP8266 (for WiFi capabilities), a PN2222 transistor, and two IR LEDs. You certainly don’t need 2 IR LEDs, but I wanted greater coverage in the apartment and I had some parts to spare.
You can easily find the parts on Amazon and they’re all just soldered to a spare piece of perfboard.

Though it’s hard to tell in the photo, the two IR LEDs are angled slightly away from one another to increase coverage of the apartment.

A few tips if you’re trying to replicate this yourself.
For a while, I was getting a lot of noise or absolutely no IR values back at all from the IR receiver. I realized that the ambient light was interfering with the IR receiver. So, the simplest solution was just to hide the circuit and the remote control under a blanket while trying to record IR signals to eliminate any noise from ambient light.
Make sure to replace the placeholders in the following code. This code is meant for an ESP8266, but should also be compatible with an ESP32. There’s certainly cleaner ways of writing this code, but my focus was on creating a proof of concept.
For the “clean up” and “dock” commands, I repeat the signal at regular intervals in the hopes that the robot vacuum cleaner is in the line of sight of the circuit at one of those time intervals. Unlike all of the other devices, the location of the robot isn’t static.
Now, I had a circuit that was capable of controlling the main devices in my apartment. The next step was the Alexa integration.
Alexa Integration
The first issue I ran into was how to establish a connection between the Alexa and the ESP8266. Both were on the same local network, but I couldn’t find a way of setting up Alexa to make a local web request. Initially, it seemed like configuring port forwarding on my router was the only option and I wasn’t too keen on doing that.
Eventually, after a bit more research, I realized that Alexa could talk to IFTTT and that IFTTT had an Adafruit integration. This meant I could use the MQTT protocol to pass commands from Alexa to my circuit through Adafruit.
The MQTT protocol, in essence, is a publisher/subscriber model often used by IoT devices. In this use case, Alexa would publish different messages (turn on tv, turn on fan, clean up) and the circuit would subscribe to Alexa’s broadcast and trigger the correct IR signal.
Tutorial
If you’re interested in replicating this same flow, start off by creating a free Adafruit account.
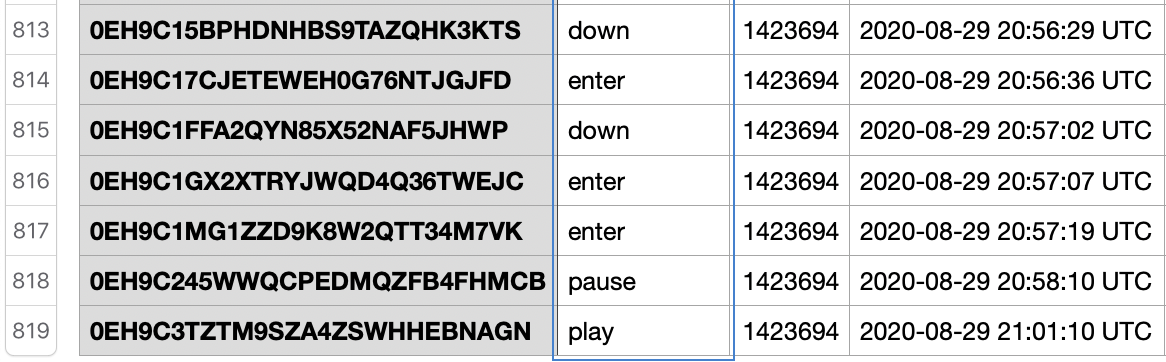
Once you’re logged in, go to Feeds and create a new Feed. In my case, I titled it smartStudio. This Feed will be a running list of all messages sent to this topic over the MQTT protocol. As you can see, a log of all the voice commands I’ve used in the last month appear in this Feed.

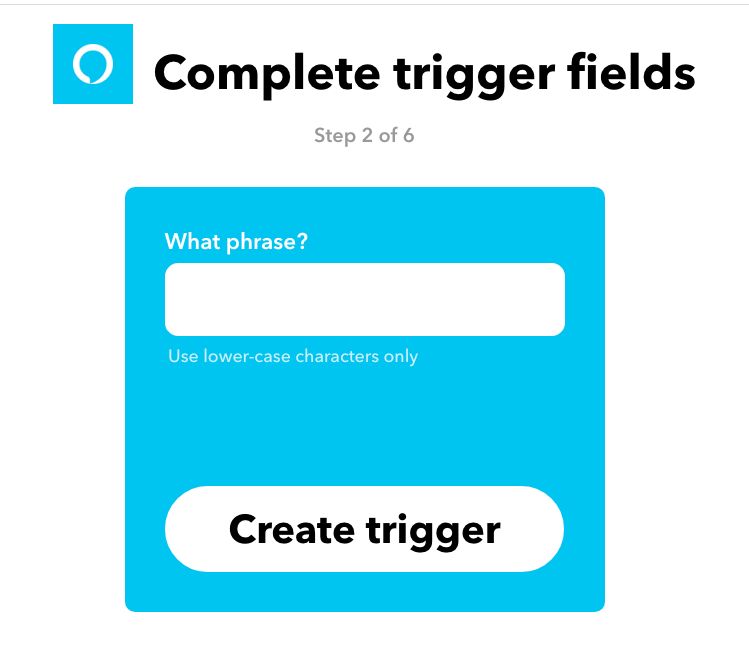
Next, we’ll integrate IFTTT and Alexa. Let’s start by creating a new IFTTT trigger.

Click on This and select Amazon Alexa. Then, select the Alexa “say a specific phrase” integration.
You’ll be asked to complete a small authorization flow if this is the first time you’re integrating these services.
Now, whenever we say the phrase we define here, Alexa will trigger the “that” portion of your IFTTT integration.
Let’s add support for turning on the television directly to HBO.

We’ve completed the Alexa portion of the flow.
Now, let’s configure Adafruit.

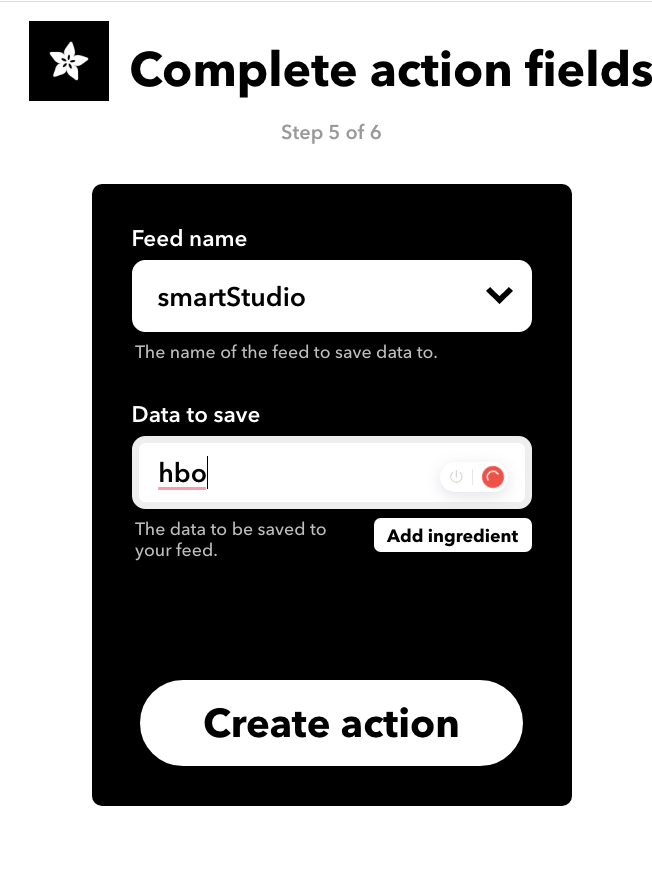
Now, we can send a message to our Adafruit Feed with a custom payload, in this case hbo. All that’s remaining is to handle this case in the code and fire off the right IR signal.
Once you’ve created a few more triggers, your IFTTT dashboard should look something like this:

Troubleshooting
Because the MQTT framework doesn’t guarantee delivery of a message, sometimes I would give Alexa a command, but the ESP8266 chip would never receive it.
It’s a fairly rare occurrence and since Adafruit doesn’t allow me to customize the quality of service settings for the MQTT implementation, there’s no immediate solution to this problem.
Some finishing touches
Now, we’re on the home stretch. We’re able to issue a command to Alexa, which gets forwarded to IFTTT, then to Adafruit, and finally to my circuit which sends out the correct IR signal.
The final issue, however, was that even though saying “Alexa, trigger clean up” and having my robot vacuum cleaner spin up was pretty cool, I really disliked the sound of the robot bumping into everything as it cleaned. The noise is very noticeable in such a small apartment.
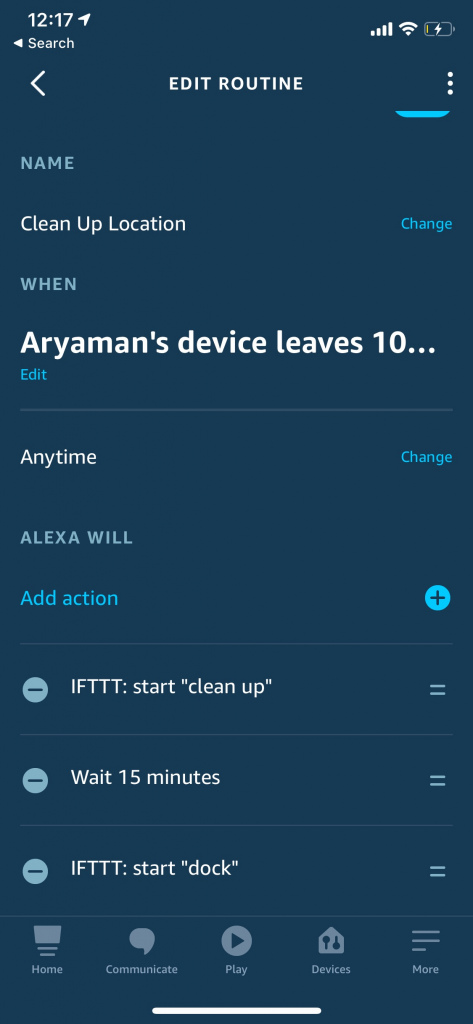
Eventually, I stumbled upon the “Routines” feature in the Amazon Alexa iOS app which allowed me to set up a few location-based triggers.
So, whenever I left my apartment, Alexa would trigger the “clean up” command. The robot would start up, and then 15 minutes later, Alexa would trigger the “dock” routine.
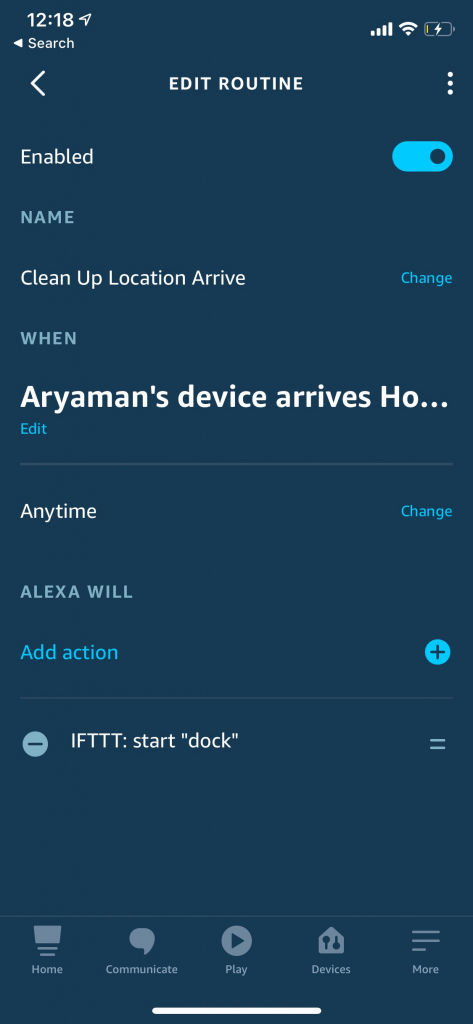
Now, my apartment would consistently stay clean and I wouldn’t have to hear the robot bumping around everywhere. Additionally, I added another routine that monitored my location to detect when I was heading back to my apartment and would preempt the cleaning with a “dock” command.
Solving first world problems, I know.
For a more useable experience, I’d also recommend enabling “follow up” mode (allows you to issue multiple commands at once) and “brief responses” on Alexa.


Now that I’ve had this installed for a couple months, I wanted to see how often I actually used it. After pulling the logs from Adafruit, I’ve used this over 800 times in this month alone [August 2020], an average of almost 30 times a day.
Hopefully, you enjoyed this post! I have a few other home automation projects in the pipeline and hope to be sharing them with you soon.
In the meantime, check out some of my other projects!
http://stickerspot.digitalbunker.dev/
https://mixrecipes.digitalbunker.dev/
http://halfway.digitalbunker.dev/
https://www.producthunt.com/@aryamansharda1/