Implementing Shared With You in SwiftUI
This is a companion article to my presentation about "Creating Shareable Experience" at iOSDevUK 2024 in Aberystwyth.
Have you ever lost track of a link, a song, or some other recommendation a friend has sent you in a busy chat? It happens to all of us and, fortunately, that's exactly what the Shared with You feature on iOS is meant to solve.
What is Shared with You?
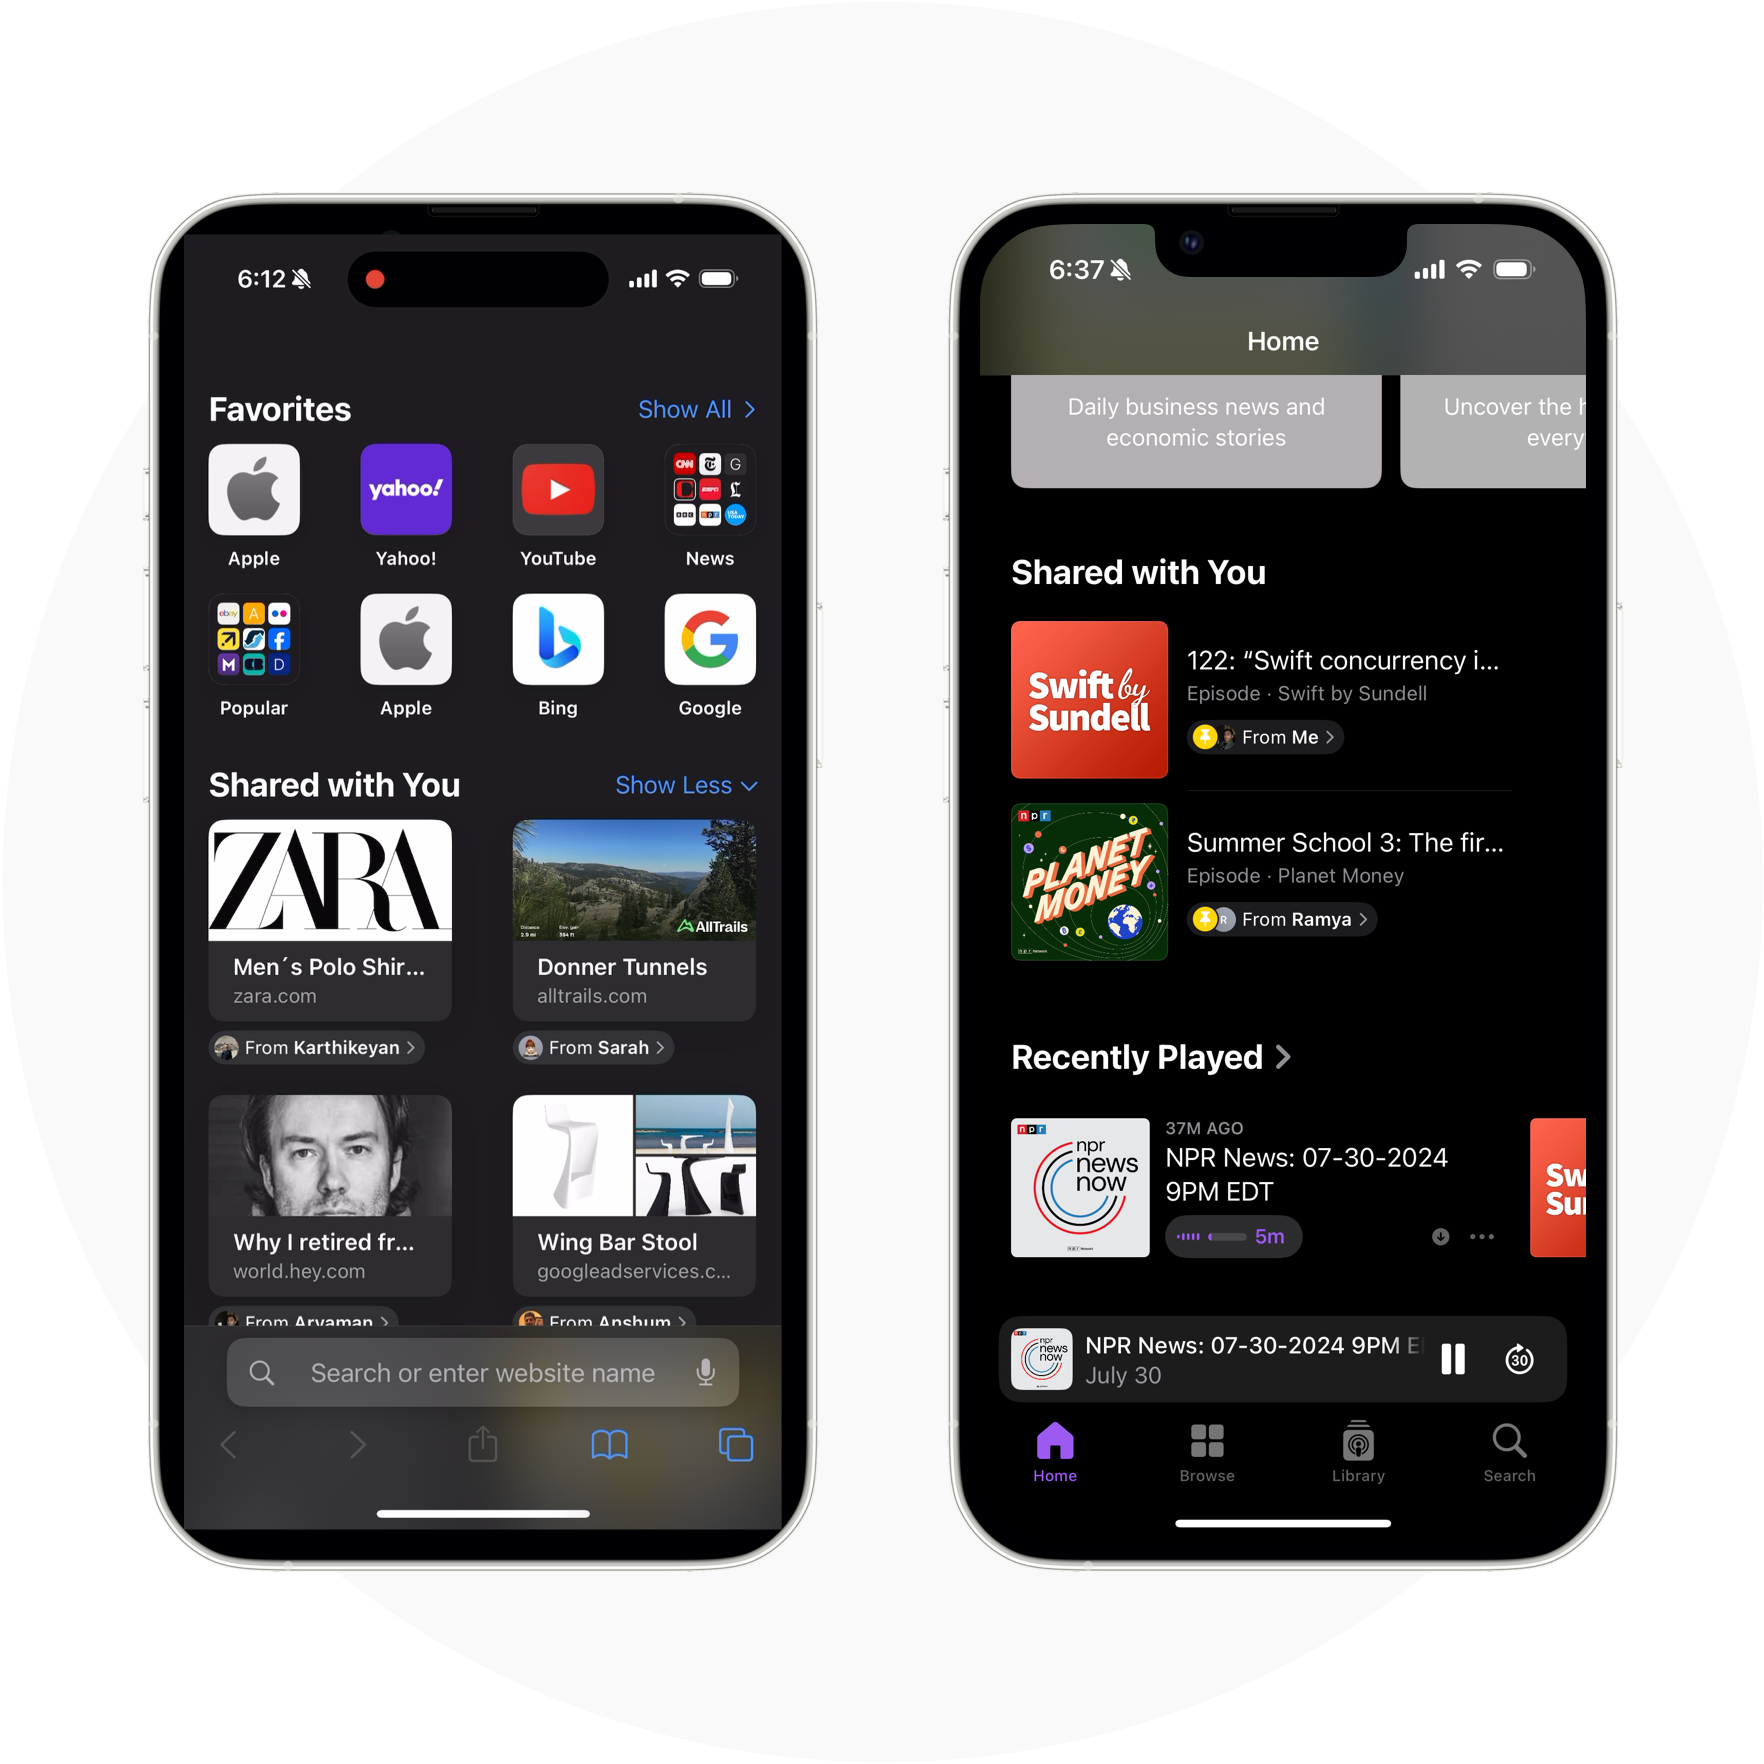
Shared with You makes it easy for users to find content that's been shared with them in Messages directly within the relevant apps. For example, here we can see all of the website links that have been shared with me by my contacts and I can keep the conversation going without ever leaving Safari:
This was originally introduced in iOS 16, but very few apps are taking advantage of it. It's really easy to implement as you'll soon see, so if your app has shareable content of any kind, I highly recommend adding this feature to your app.
Getting Started
Before we jump into the code, there’s a few things you should know first:
- In order for your app to support Shared With You, your app needs to support Universal Links since this is how Apple verifies that the links shared in Messages belong to your app.
- Since Shared with You relies on Messages, you’ll need to test your app on a physical device.
- The framework only pulls content from saved contacts, so make sure the person who sent you the link is saved in your contacts when you're testing your implementation.
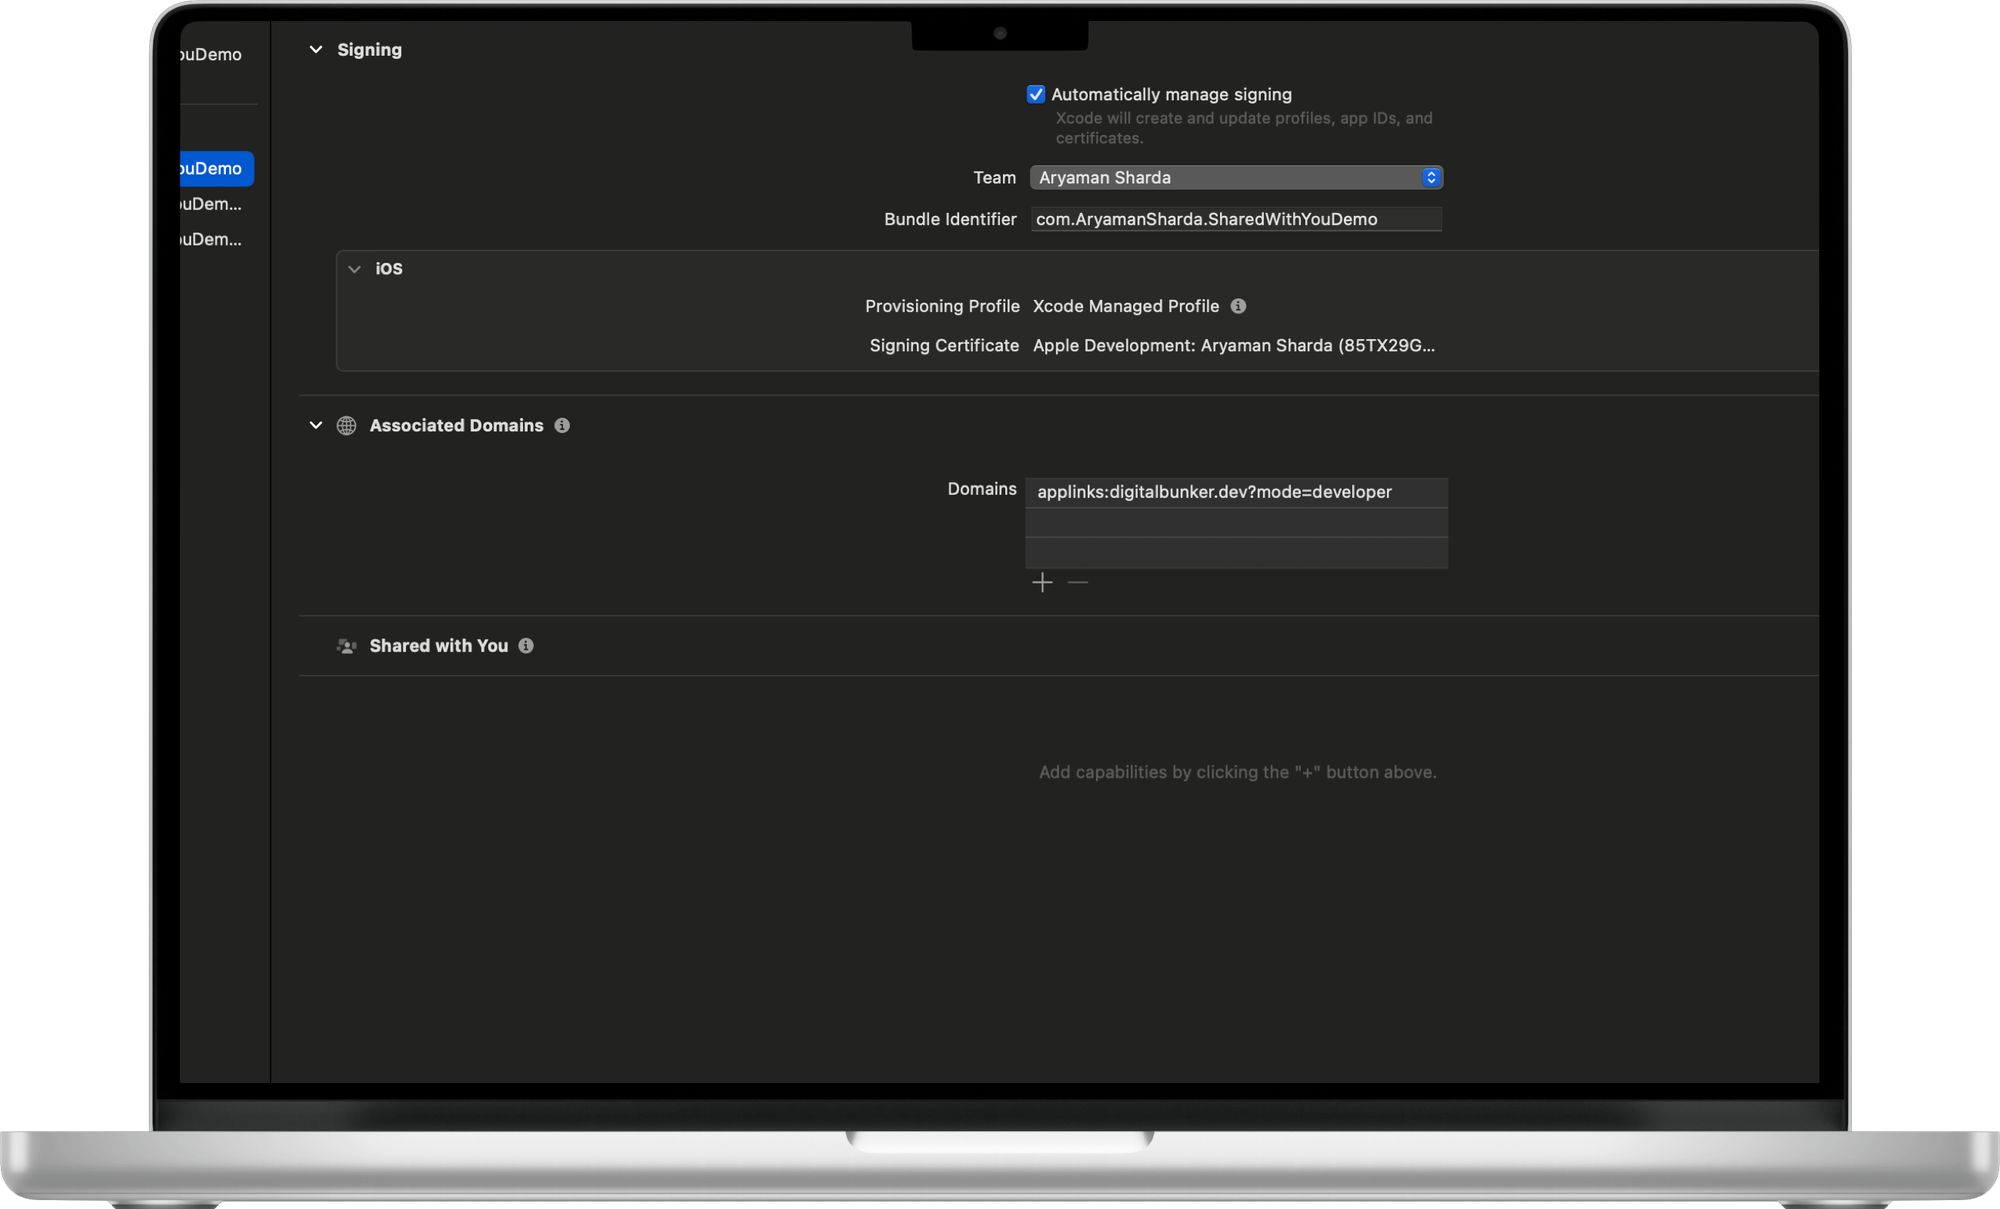
Our only real setup step is to add the Shared with You capability to our Xcode project:
Implementation Overview
In most Shared with You implementations, you’ll see two components - the shelf and the attribution view.
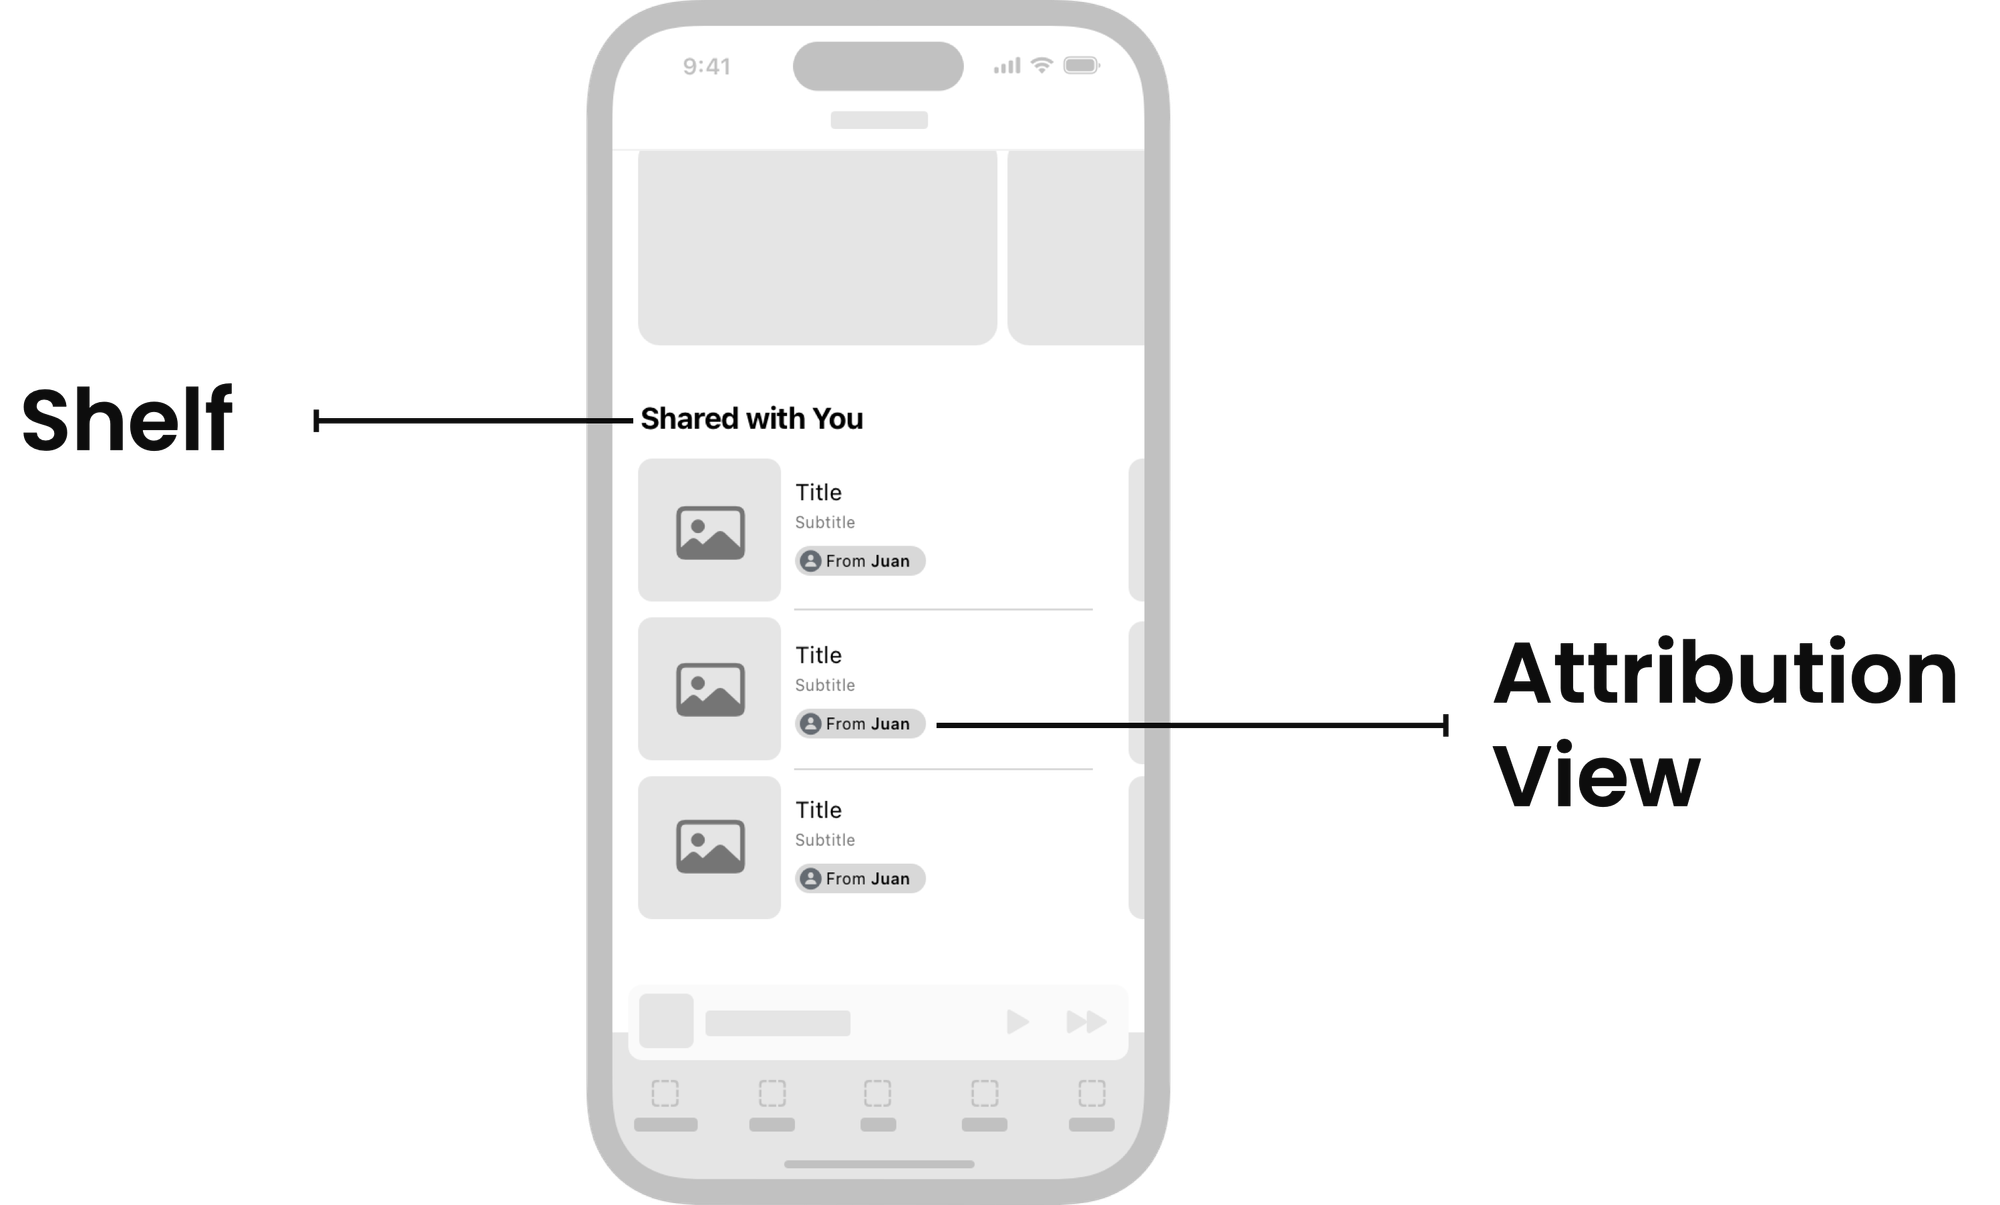
Shelf
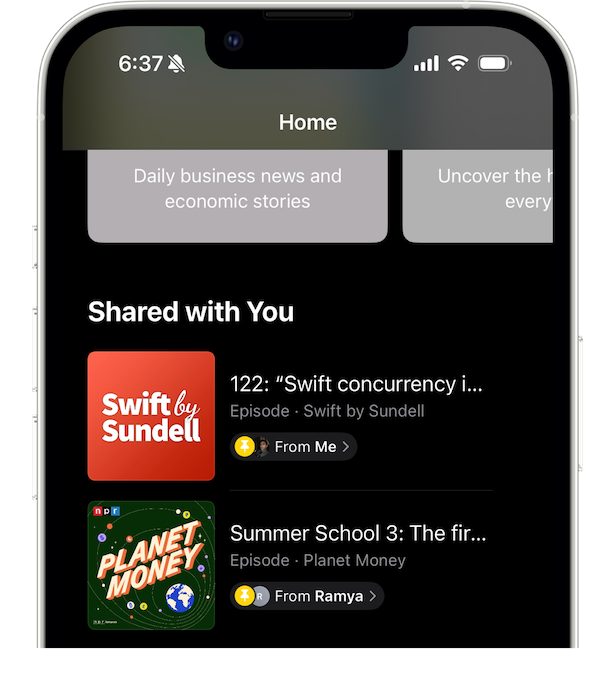
The shelf lists all of the content shared with you in Messages in a single convenient location. The system automatically organizes this shelf, starting with Siri Suggestions based on recent interactions with the content, then pinned messages, and finally, it sorts everything else chronologically.
Attribution View
The attribution view lets you see who shared the content with you and shows you their name, their profile picture, and provides a link back to the original message in the conversation.
Now, as far as I know, you’re not required to have a dedicated shelf in your implementation, but Apple does recommend it. If you prefer, you can just use the attribution view directly to call out shared content in your app.
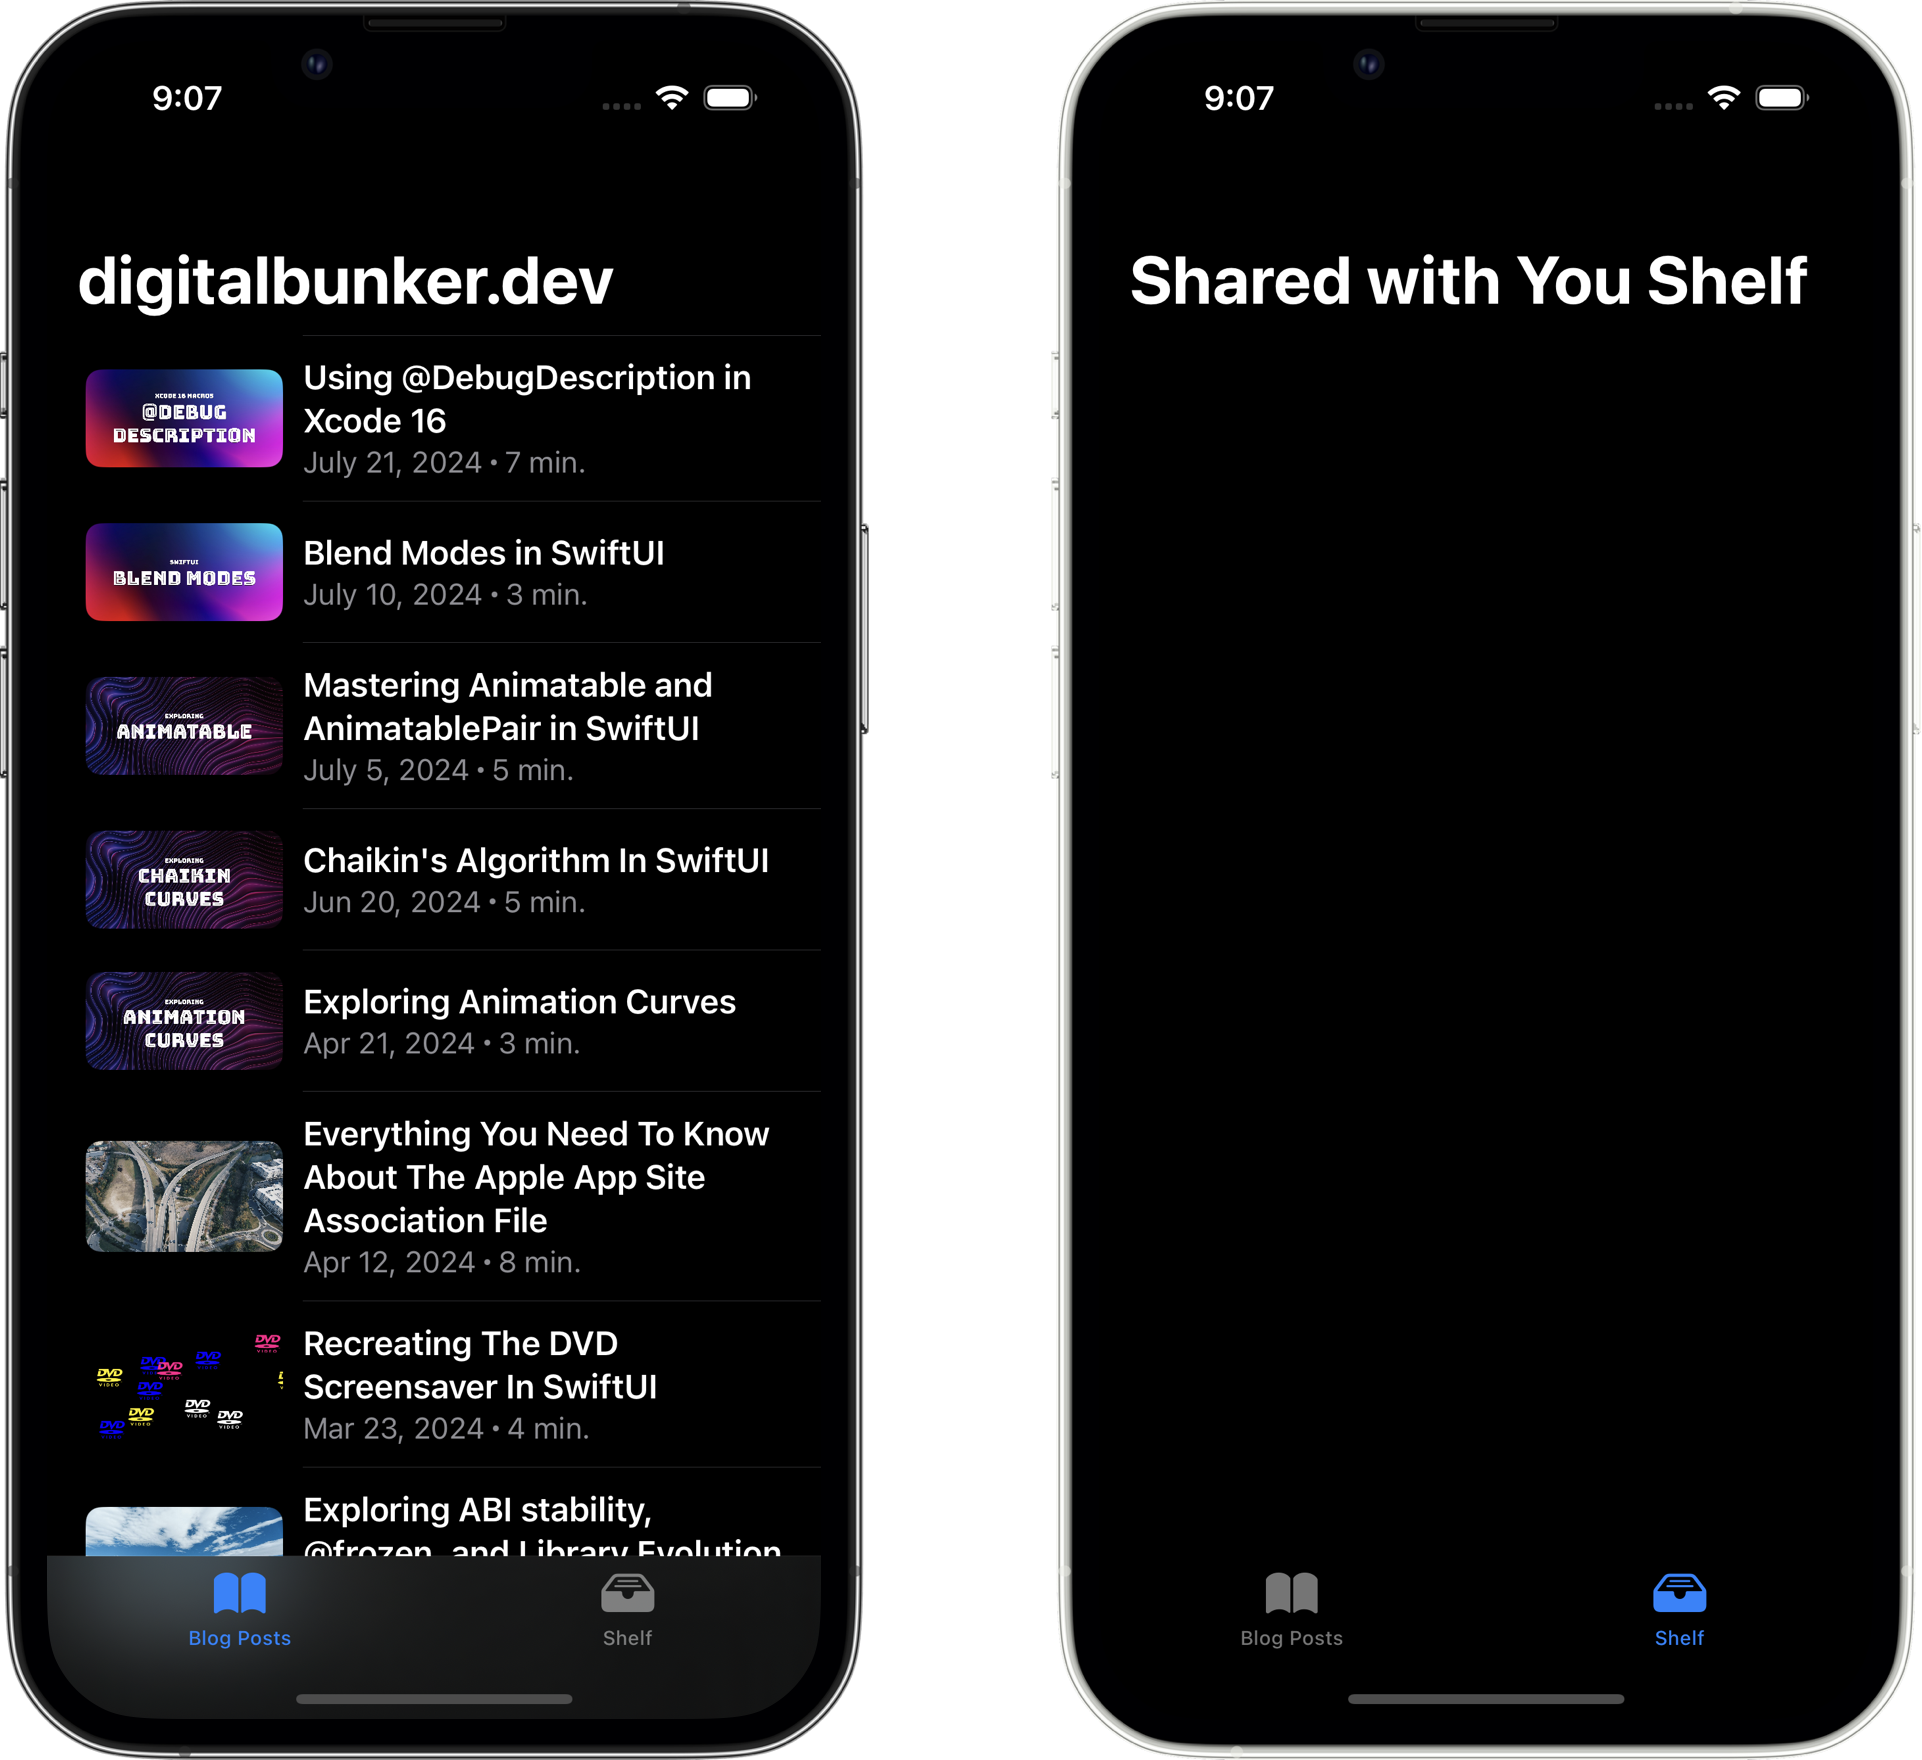
Let's add Shared with You support to this app.
The first tab shows a list of blog posts from this website, and in the second tab, we’ll create a shelf to display posts shared with us by our contacts.
Retrieving Links
To get a list of links shared with the user, we’ll create an instance of SWHighlightCenter, the main class responsible for retrieving and managing shared links.
import SharedWithYou

// Provides the application with a priority-ordered list of
// universal links which have been shared with the current user.
private let highlightCenter = SWHighlightCenter()
Next, we'll use the SWHighlightCenter to get a list of highlights. A highlight represents a single shared item, so anytime you see highlight, think of it simply as the link shared with the user.
We’ll save the highlights to a @Published property which we’ll eventually use to populate our shelf:
import SharedWithYou

final class SharedWithYouService: NSObject, ObservableObject {

    // Each highlight represents a shared link
    @Published var highlights: [SWHighlight] = []

    // Provides the application with a priority-ordered list of universal links
    // which have been shared with the current user.
    private let highlightCenter = SWHighlightCenter()

    override init() {
        super.init()

        highlights = highlightCenter.highlights
    }
}
Then, we'll implement the HighlightCenterDelegate function so we can get notified whenever the highlights change:
import SharedWithYou

final class SharedWithYouService: NSObject, ObservableObject, SWHighlightCenterDelegate {

    // Each highlight represents a shared link
    @Published var highlights: [SWHighlight] = []

    // Provides the application with a priority-ordered list of universal links
    // which have been shared with the current user.
    private let highlightsCenter = SWHighlightCenter()

    override init() {
        super.init()

        highlights = highlightsCenter.highlights
        highlightsCenter.delegate = self
    }

    func highlightCenterHighlightsDidChange(_ highlightCenter: SWHighlightCenter) {
        highlights = highlightsCenter.highlights
    }
}
Don’t forget to implement this delegate otherwise you won’t receive any content.
And, that's it! That's all the code we need to get a list of the content shared with the user. We now have a real-time updating list of links that we can use to populate our shelf.
All that’s left to do is render the attribution view.
Feel free to skip this section and continue with the implementation details below.
Closer Look at SWHighlight
The SWHighlight also includes details like who shared the content and a reference to the original message, but the only public properties we have access to are the identifier and URL fields:
SW_EXTERN @interface SWHighlight : NSObject <NSSecureCoding, NSCopying>

/*!
    @abstract The unique identifier for this highlight
 */
@property (copy, readonly, nonatomic) id <NSSecureCoding, NSCopying> identifier;

/*!
    @abstract The surfaced content URL
 */
@property (copy, readonly, nonatomic) NSURL *URL;

- (instancetype)init NS_UNAVAILABLE;
+ (instancetype)new NS_UNAVAILABLE;
@end
Fortunately though, all we really need is the URL. We can use the information in the URL to figure out what data we need to fetch from our backend.
For instance, in our earlier Podcast example, the URL would likely contain a podcastID that we could send to a backend endpoint to retrieve the remaining details needed to display the podcast on our shelf, like the thumbnail, author, length, etc.
Displaying Links
The Shared with You framework includes the SWAttributionView class for displaying attribution views, but it doesn't have SwiftUI support out of the box. We can easily add support by making a custom UIViewRepresentable and passing in the highlight we want the attribution view to be tied too.
We’ll start by creating an instance of our SWAttributionView and we’ll start configuring it.
The displayContext informs the system about the environment we’re showing the attribution view in - we want to use .summary when we’re presenting the view in a top-level list and .detail when we’re showing the view in some kind of detail page. Knowing the context the user is encountering the attribution view in helps the system rank this highlight in the shelf.
struct SWAttributionViewRepresentable: UIViewRepresentable {
    let highlight: SWHighlight

    func makeUIView(context: Context) -> UIView {
        let attributionView = SWAttributionView()
        attributionView.horizontalAlignment = .leading

        // Change `.summary` to `.detail` if presenting in
        // a detail view.
        attributionView.displayContext = .summary
        attributionView.highlight = highlight
        attributionView.backgroundStyle = .default
        attributionView.menuTitleForHideAction = "Remove Article"

        return attributionView
    }

    func updateUIView(_ uiView: UIView, context: Context) {}
}
This view is really locked down and the only things Apple lets us customize here are some basic layout properties - no colors, no fonts, not even the height.
We'll explore some customization options in a moment, but let's finish implementing our shelf.
Creating The Shelf
We’ll use the SharedWithYouService we created earlier and the SWHighlightCenter to get a list of highlights (remember a highlight is just how the framework represents a shared link).
We’ll integrate over all of them and create an attribution view and BlogPostRow for each which will give us this:
struct SharedWithYouShelf: View {
    @StateObject var sharedWithYouService = SharedWithYouService()

    var body: some View {
        NavigationView {
            List(sharedWithYouService.highlights, id: \.url.absoluteString) { highlight in
                VStack {
                    SWAttributionViewRepresentable(highlight: highlight)
                    BlogPostRow(blogPost: getBlogPostFrom(highlight))
                }
            }
        }
    }
}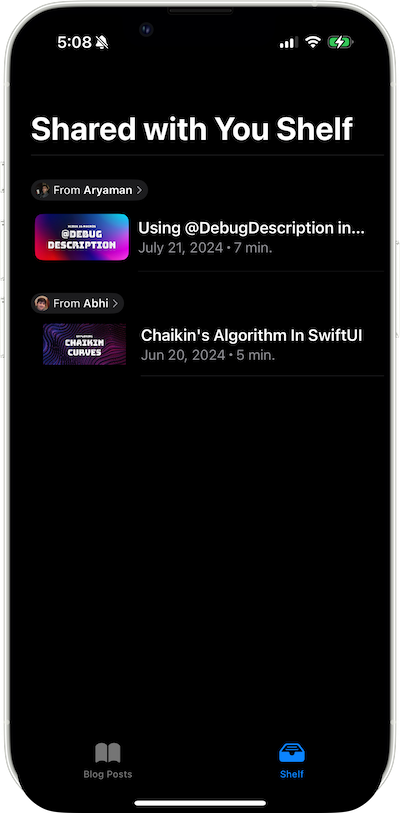
Now, Apple’s documentation suggests that your shelf should offer a rich preview of the content, including a thumbnail, title, subtitle, and attribution view, which you can see we’ve implemented here for each highlight.
Apple wants the presentation of these attribution views to be secure and they don’t want to reveal any information about the recipients or the conversations, so Apple creates these views on your behalf “out of process”. This means that this view is rendered by a separate process off the main thread, so you can add this feature to your app without worrying about it really affecting your app’s performance.
And that it’s - that’s all the code we need to build our shelf and call out shared content in our apps.
Customizing The Menu
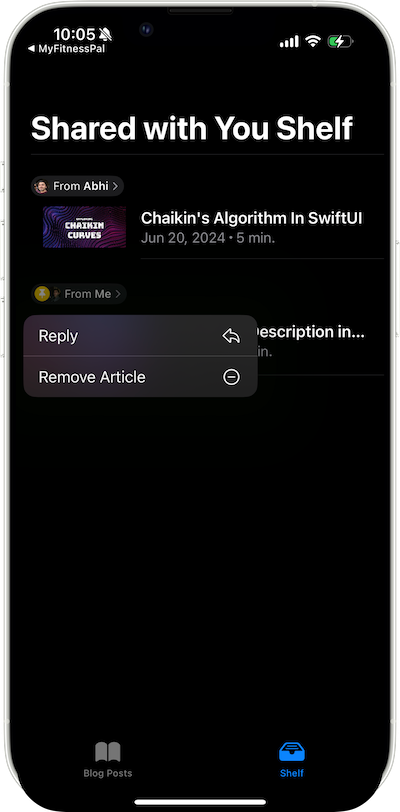
In our current implementation, if we were to long press on the SWAttributionView, we'd see a supplemental menu with some default actions:
- "Reply" will bring up the relevant message in the conversation allowing us to reply without leaving the app.
- "Remove Article" will prevent this link from appearing in Shared with You.
Now, while Shared with You is generally very locked down, Apple exposes some customization options here that allow us to add a few more options to this menu.
In order to do that, we'll need to update our UIViewRepresentable implementation from earlier.
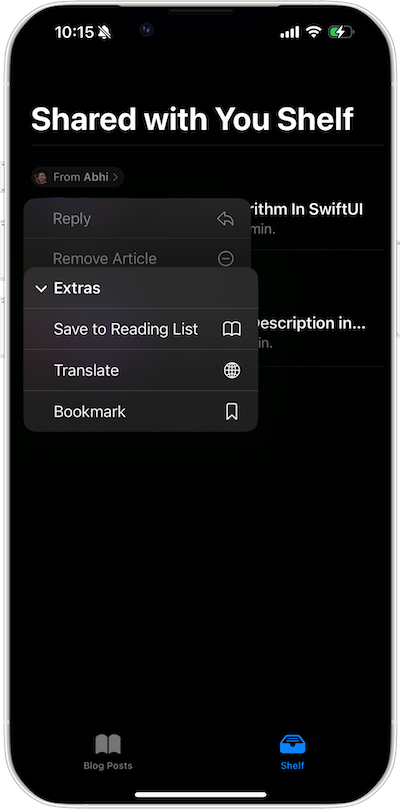
First, we'll add a series of custom UIActions that we want to add to this menu. These will be specific to your use case, but in the case of our list of blog posts, we may want to expose actions for saving to the user’s reading list, translating the article, and bookmarking it.
func makeUIView(context: Context) -> UIView {
    let attributionView = SWAttributionView()
    ...

    // Action to save the article to a reading list
    let saveToReadingListAction = UIAction(
        title: "Save to Reading List",
        image: UIImage(systemName: "book")
    ) { _ in ... }

    // Action to translate the article
    let translateAction = UIAction(
        title: "Translate",
        image: UIImage(systemName: "globe")
    ) { _ in ... }

    // Action to bookmark the article
    let bookmarkAction = UIAction(
        title: "Bookmark",
        image: UIImage(systemName: "bookmark")
    ) { _ in ... }
Then, we can just define our new menu, specify a title and the children to show and assign it to the attribution view's supplementalMenu property.
func makeUIView(context: Context) -> UIView {
    let attributionView = SWAttributionView()
    ...

    // Action to save the article to a reading list
    let saveToReadingListAction = UIAction(
        title: "Save to Reading List",
        image: UIImage(systemName: "book")
    ) { _ in ... }

    // Action to translate the article
    let translateAction = UIAction(
        title: "Translate",
        image: UIImage(systemName: "globe")
    ) { _ in ... }

    // Action to bookmark the article
    let bookmarkAction = UIAction(
        title: "Bookmark",
        image: UIImage(systemName: "bookmark")
    ) { _ in ... }

    attributionView.supplementalMenu = UIMenu(
        title: "Extras",
        children: [
            saveToReadingListAction,
            translateAction,
            bookmarkAction
        ]
    )
    return attributionView
}
And now we have these custom options appearing whenever we interact with the SWAttributionView.
Testing
Lastly, I want to call out some things to make your testing easier.
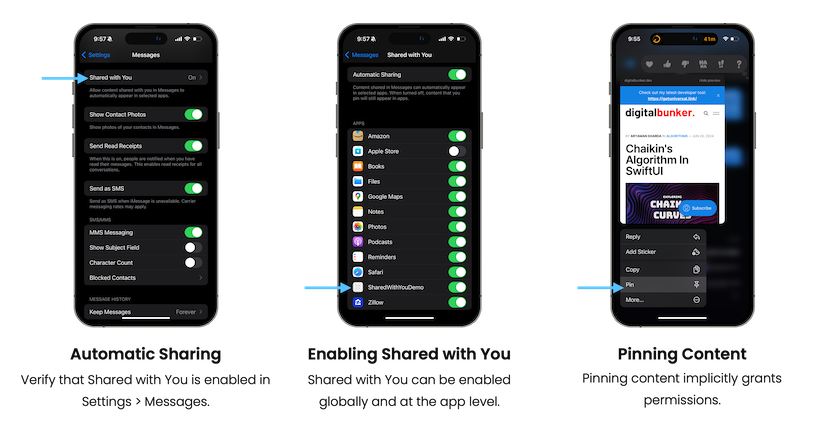
- In the Settings app, go to Messages, and verify that Shared with You is enabled globally across your device. This should be true by default, but it’s good to double-check.
- Apple lets users disable automatic sharing, both globally and for individual apps, so make sure Shared with You is turned on explicitly for your app too.
- Pinning content in Messages is a great way to verify your implementation since it automatically grants Shared with You permissions. So, if you’ve pinned a message from a known contact and still aren’t seeing results in the
HighlightCenter, the issue likely lies elsewhere in your implementation.
In case you missed it, here's a recording of my talk at SwiftCraft earlier this year:
If you're interested in more articles about iOS Development & Swift, check out my YouTube channel or follow me on Twitter.
And, if you're an indie iOS developer, make sure to check out my newsletter! Each issue features a new indie developer, so feel free to submit your iOS apps.
 Indie Watch